Transactional Message Header Section
The Header section of the transactional message template creation screen allows you to define:
- the type of transactional message template you want to user (this option is only accessible if your account has the Transactional Message with Attachments option activated)
- the name and description of the template
- the header and transactional message send settings.
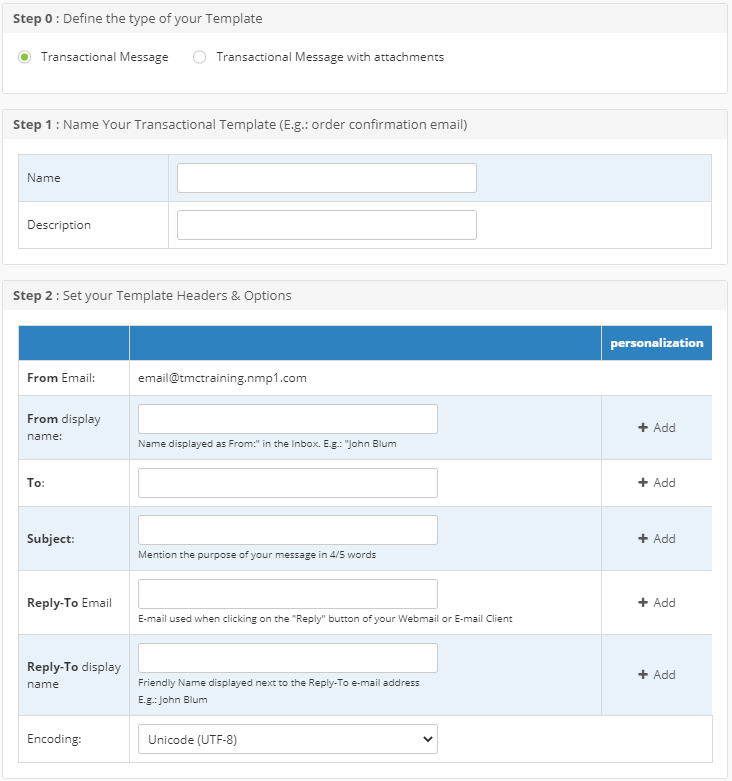
| Option | Description/Action |
|---|---|
| Define the type of your Template | The type of transactional template you want to use:
infoThe "Define the type of your Template" option is only displayed if you have access to both types of transactional message templates on your account. |
| Name | Name of the transactional message template. |
| Description | Description of the transactional message template. |
| From Email | The sender email address defined for your account. This entry can be changed in the Headers Setup (TMP) of the Account settings section. |
| From display name | The information that will be displayed next to the sender email in the email's From field. |
| To | The information that will be displayed in the email's To field. |
| Subject | The information that will be displayed in the email's Subject field. |
| Reply-To Email address | The email address that should serve as the email's reply-to address. |
| Reply-To Label | The information that will be displayed next to the reply-to email address. |
| Personalization | This option allows you to add a EMV DYN personalization parameter to the email header data. When you click the "+ Add" button, you enter the personalization parameter that will be configured with the personalized value when the message is generated to be sent.ExampleIf you enter the parameter tag |
| Encoding | The encoding that will be applied to the message. |