Switch Personalization
Switch personalization allows you to add combined conditional personalization to your transactional message template by creating multiple conditions each with their own HTML and/or text input.
To add switch personalization:
- Enter
&&&in the part of the transactional message template where you want to add the personalization. - Click Personalize Content.
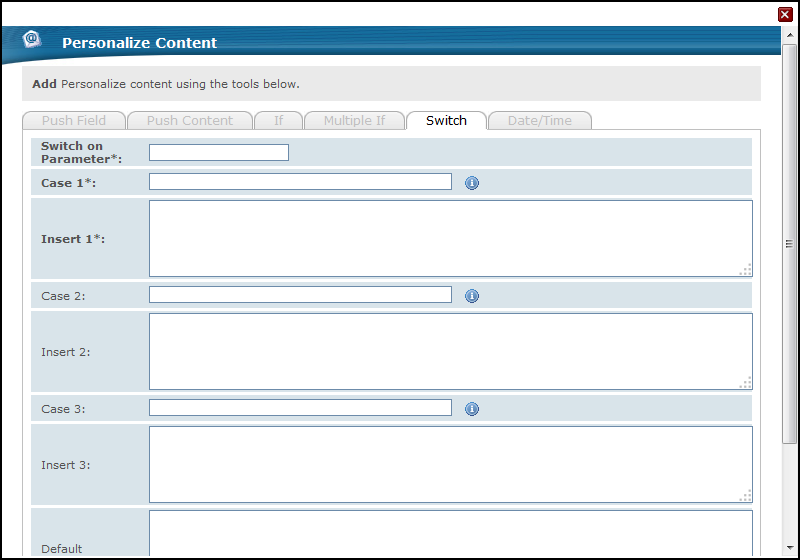
- In the Message Personalization window, go to the Switch tab.
- In the Switch drop-down menu, select the member database field that will be used as reference.
- In the Case 1 field, enter one of the values that should match the database field content to trigger the insertion of the conditional HTML and/or text.
- In the Insert 1 field, enter the HTML and/or text that will be displayed if the first condition is met.
- In the Case 2 field, enter the second value that should match the database field content to trigger the insertion of the conditional HTML and/or text.
- In the Insert 2 field, enter the HTML and/or text that will be displayed if the second condition is met.
- In the Case 3 field, enter the third value that should match the database field content to trigger the insertion of the conditional HTML and/or text.
- In the Insert 3 field, enter the HTML and/or text that will be displayed if the third condition is met.
- In the Default field, enter the HTML and/or text that will be displayed if none of the conditions are met.
- Click Add to Body to add the personalization the transactional message template.